Hello again!
My new sewing machine and I have become inseparable over the last few days and today I want to share with you my latest project....
 A Fabric Midori Travelers Notebook cover...
This is another planner and holds my monthly calendar, weekly diary, diet/weight loss and fitness records and a journal booklet. You can find out more about the world of Midories from here
Its taken several attempts, and there are still things I would change, but I'm really pleased with it and wanted to do a little Tutorial for how I made it.
Step 1) Gather all your equipment;
I chose two bits of fabric that measures approx 8 3/4 inch x 10 3/4 inch, a fabric hole puncher, an eyelet press (and eyelets), elastic x 2 (one for pen loop and one for inserts and to fasten the midori) and a piece of lining fabric (interfacing would have been better here, but I didn't have any so I used two pieces of old thin fleece)

Step 2) Lets get going;
With wrong sides together, and the pen loop inserted into what would be the back of the midori, pin and sew around three sides (leave the bottom biggest edge open).

Step 3) Insert the lining;
Turn the right way out and insert the lining (if you are using interfacing, this would need to be done before you sew the pieces together wrong sides out)


Step 6) Practice makes perfect!
Next, I practiced using my eyelet hole and puncher on some scrap fabric to make sure I was happy with the result (make sure you practice with the same number of layers as you have on your midori - so for me, this was 4 layers)

Step 7) Thread the elastic;
With the eyelets in place (two at the top, two at the bottom and one in the centre back for the elastic that holds it all together) thread your elastic and tie a knot for the midori booklets to slide into (you can see lots of Youtube videos for how to do this) and make a loop for the holding elastic.


Now all you have to do is fill it will your booklets and your done!
 And there you have it! Needs a bit of improving of course, but you can get the gist!
If you make one using this tutorial, I'd love to see it! And please be kind and tag me!
That's all for now. Until next time, you take care now x x
My new sewing machine and I have become inseparable over the last few days and today I want to share with you my latest project....

This is another planner and holds my monthly calendar, weekly diary, diet/weight loss and fitness records and a journal booklet. You can find out more about the world of Midories from here
Its taken several attempts, and there are still things I would change, but I'm really pleased with it and wanted to do a little Tutorial for how I made it.
Step 1) Gather all your equipment;
I chose two bits of fabric that measures approx 8 3/4 inch x 10 3/4 inch, a fabric hole puncher, an eyelet press (and eyelets), elastic x 2 (one for pen loop and one for inserts and to fasten the midori) and a piece of lining fabric (interfacing would have been better here, but I didn't have any so I used two pieces of old thin fleece)

With wrong sides together, and the pen loop inserted into what would be the back of the midori, pin and sew around three sides (leave the bottom biggest edge open).

Step 3) Insert the lining;
Turn the right way out and insert the lining (if you are using interfacing, this would need to be done before you sew the pieces together wrong sides out)

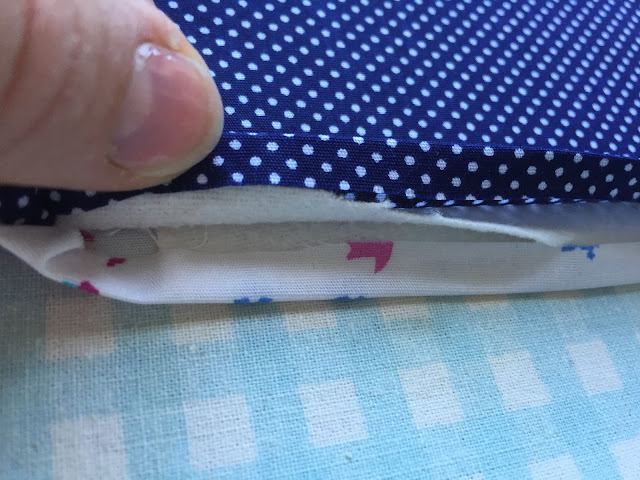
Step 4) Finish off the bottom
Fold over the bottom edges and iron flat, then sew alone this edge with a top stitch...

...continue this all the way around. You may want to do a second top stitch around too, but I didn't. Then iron it again...and again, and again!!

Step 6) Practice makes perfect!
Next, I practiced using my eyelet hole and puncher on some scrap fabric to make sure I was happy with the result (make sure you practice with the same number of layers as you have on your midori - so for me, this was 4 layers)

Step 7) Thread the elastic;
With the eyelets in place (two at the top, two at the bottom and one in the centre back for the elastic that holds it all together) thread your elastic and tie a knot for the midori booklets to slide into (you can see lots of Youtube videos for how to do this) and make a loop for the holding elastic.


(The top picture here is from the inside and the bottom is from the outside)

(I have four booklets in mine)
If you make one using this tutorial, I'd love to see it! And please be kind and tag me!
That's all for now. Until next time, you take care now x x